Wedging Tutorial in pictures
Wedging prepares the clay for use. It helps to evenly disperse
the water content throughout the ball of clay, removes any air bubbles
and alighs the particles in a spiral pattern. |
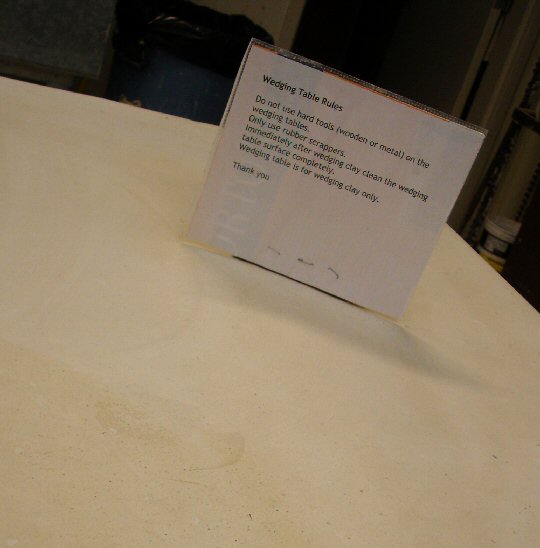
The wedging table is a large plaster
surface. It can be easily gouged or damaged so hard tools should
never be used on it. Some wedging tables are covered with canvas.
|
|

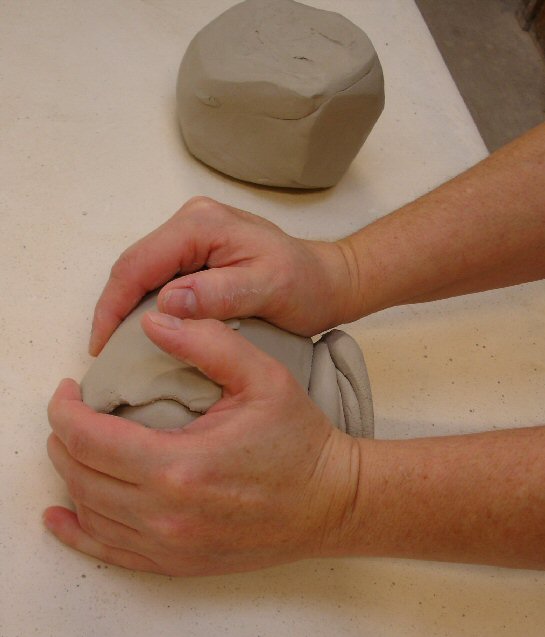
The ball of clay is held firmly in both
hands, on the plaster surface.
To begin wedging, place a hand on each side of the ball
of clay. Push on the clay with the heels of your
hands in a downward motion away from yourself, while
using your fingers to keep inward pressure on the ball
of clay. Your hands should move about two to three
inches each time. The bottom of the clay ball should
spread outward slightly against the table and form a
slight tail.
|
|
Notice the "tail" being formed between
your hands. Press down and away from yourself using the heels of
your hands. Rock the ball of clay back and up, so it is on its
tail. Repeat this pattern about 50 times.
|
|

Here you can see the spiral pattern the
clay is forming as it is wedged. (Note: The hands are not in
proper wedging position in this picture.)
Now you are ready to go to the wheel and
center your clay.
|
|